Product Updates

23 December, 2021
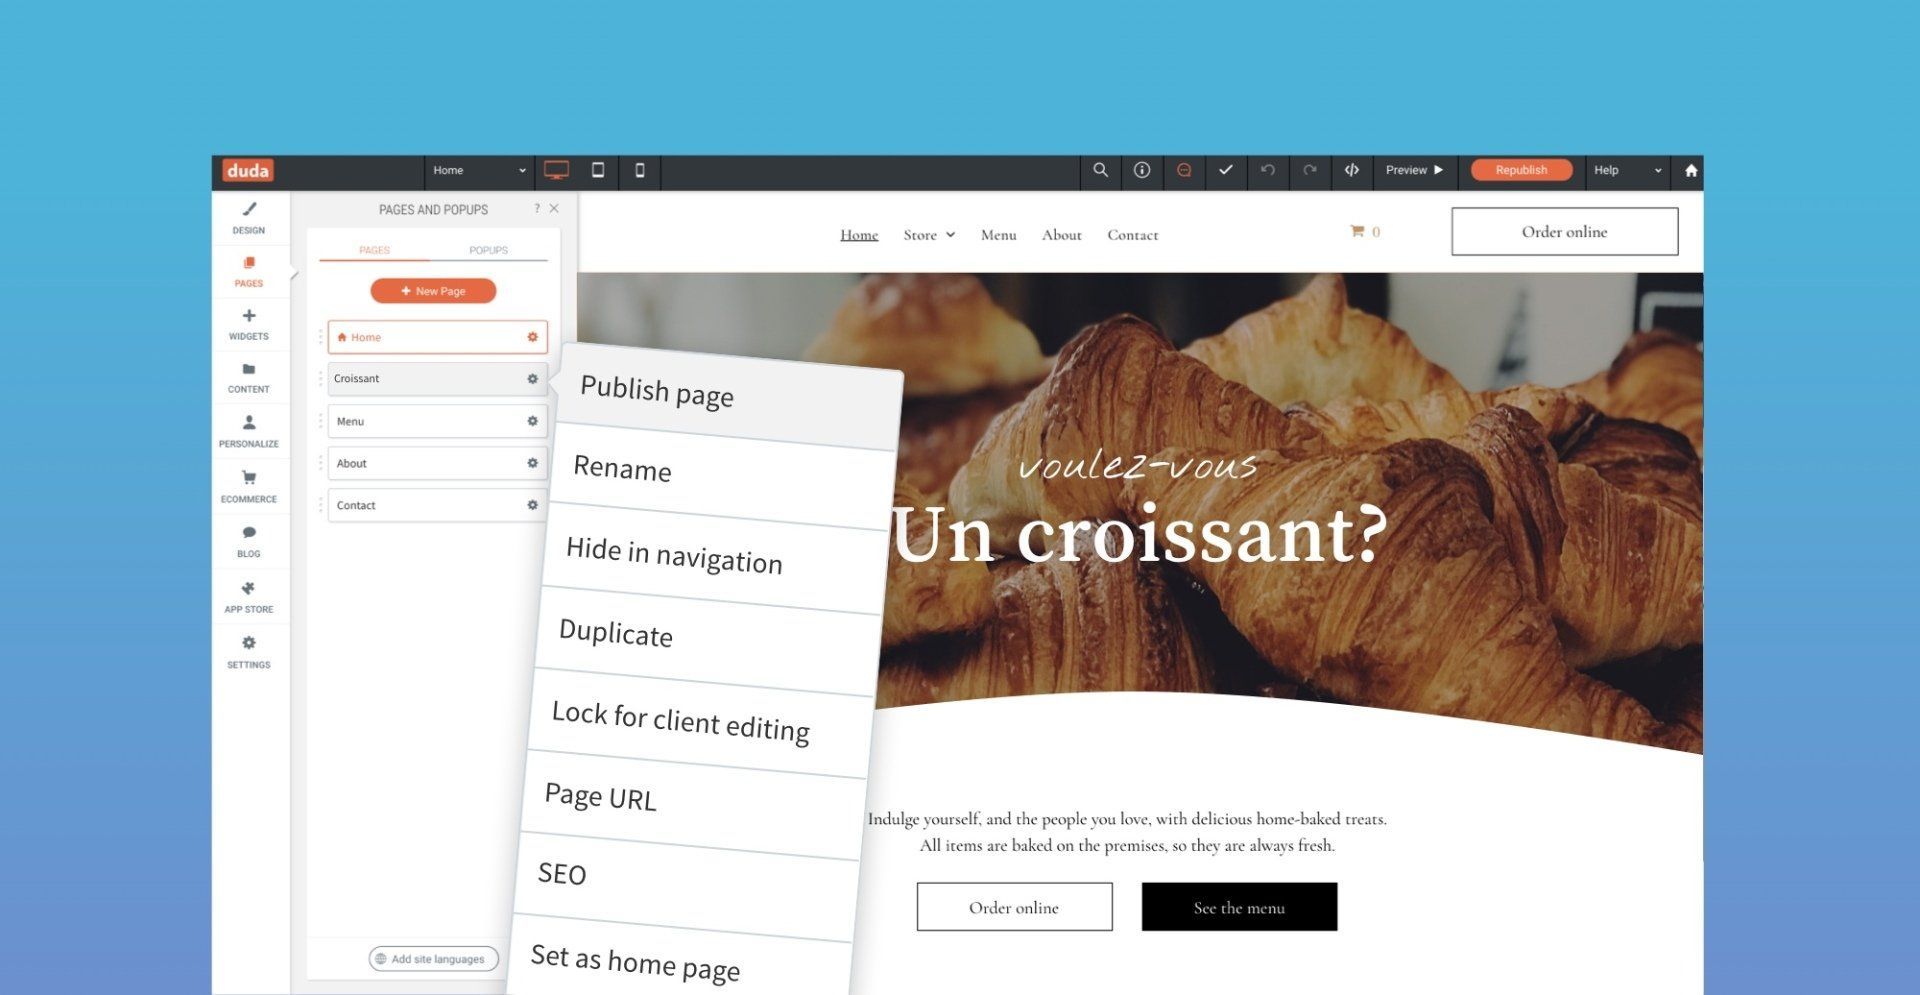
Update your sites quickly and simply with the new Publish page capability. It enables you to publish a single page on a site, without having to republish the entire site, so you can set changes live as soon as they are ready.
Available with Agency plan and up.
Update any site page and set it live
Now that you can update pages directly from the Pages panel, you have more flexibility and efficiency when it comes to republishing your sites:
- No need to wait for customers to send everything in order to update their sites. If customers send materials for one page at a time, you can simply update and publish those pages as you go.
- Enjoy a more flexible site-building process. Your team can work on multiple pages at once and only publish the ones that are ready. No need for the entire site to be ready before going live.
To publish a single page, go to the Settings of the page and select Publish Page. Once it's published, an indication is displayed on the page and an auto backup is created.
3 December, 2021

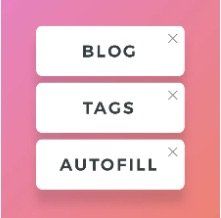
In Collections, field types enable you to classify content so you can connect it to the most appropriate widget. In addition to the existing field types, you've now got Date & Time, which opens new options for displaying this info in your sites.
For example, can set up the content for classes, workshops or special events in a Photo Gallery connected to a collection, and use the Date & Time field to display the time and date in the format that you prefer. Also, though the Date & Time field allows for both date and time to be displayed, you can choose to display only date (or only time). For example:
- October 31, 2021
- Oct 31, 2021
- Sunday October 31, 2021
- 12:00 AM
- Sunday, October 31, 2021, 12:00 AM
18 November, 2021
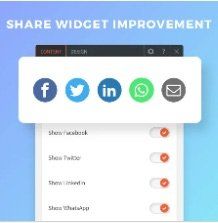
Social networks links are so important
Having social media links on your sites enables your clients to engage with their audiences in their preferred channels so they can stay in touch with visitors after they leave the site. They also increase trust and authenticity.
With this improvement, it's easy to add additional icons at any time to meet the changing needs of your clients, and to accommodate new, newly popular, and niche social networks.
3 October, 2021
In addition to the Button widget, you can now set the following widgets to float:
- Icon
- Shape
- Click to call
- Click to email
- Social Icons
- Any widget that you build with the Widget Builder
29 September, 2021
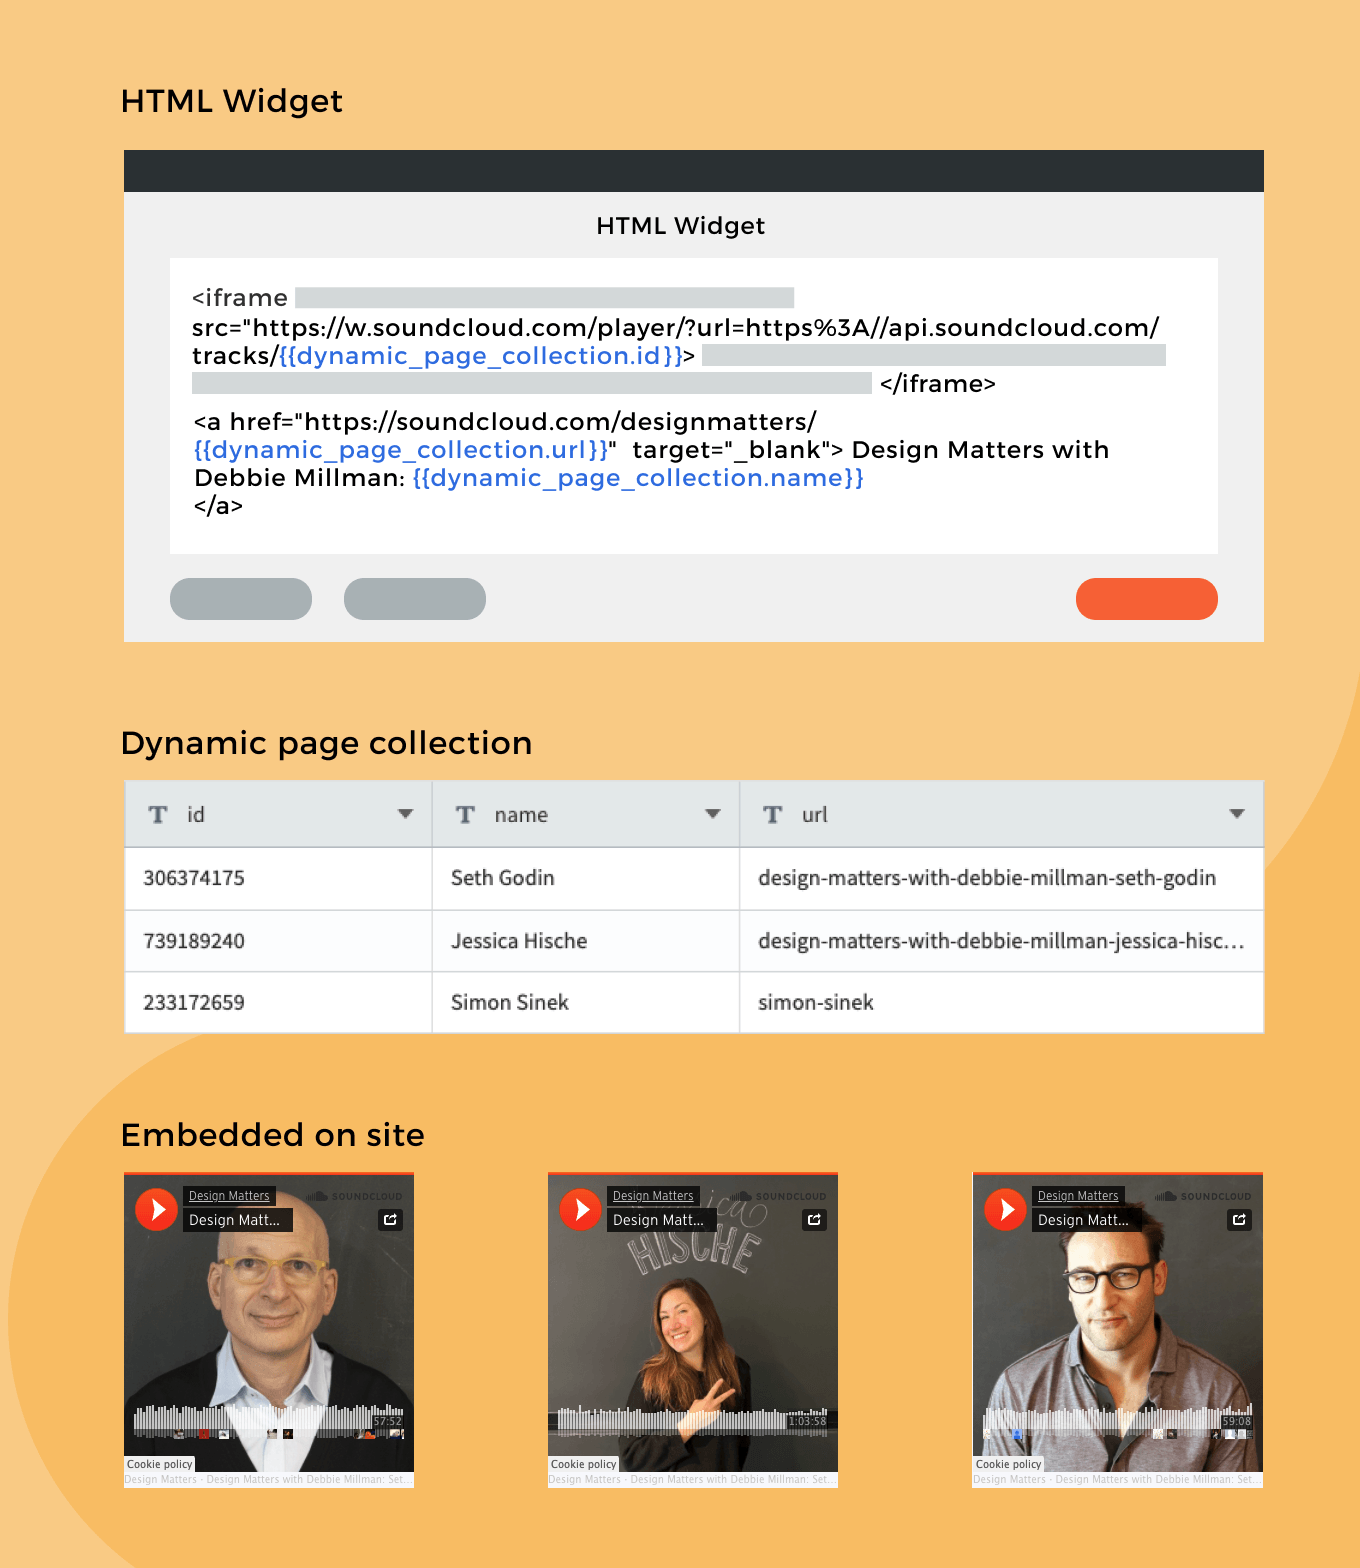
How to Use This in Dynamic Pages
The HTML widget allows you to add customized code to your site. With this new addition, you can combine connected data elements in it.
- For example, if you want to embed an element in your Dynamic Page – a podcast from SoundCloud, an external calendar or any customized code – and you want it to be different in each dynamic page, you can store the ID in your collection and embed the code in the HTML widget. In the widget itself, click ‘Connect’, select the ID field, and paste it in the relevant place.
15 September, 2021
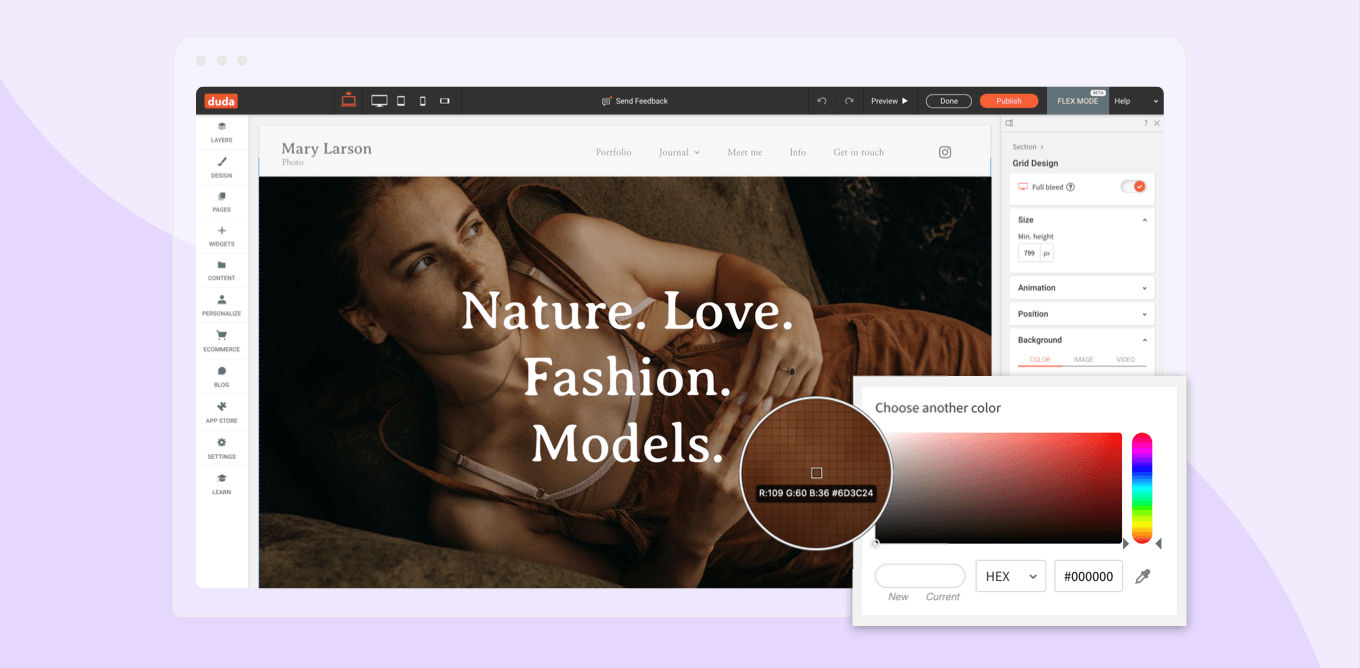
Match colors perfectly on your site with the new eyedropper tool, which enables you to pull a color from anywhere on your site - images, texts, you name it - and match it perfectly somewhere else. No need to spend any time trying to figure out a color’s exact name or value.
The eyedropper makes it easy to design great-looking, consistently colored sites, quickly and easily. You can use it to:
- Pull a color from an image, and use it for the headline or button.
- Pull a color from anywhere on the screen and drop it in the editor.
1 August, 2021
So handy and easy to add
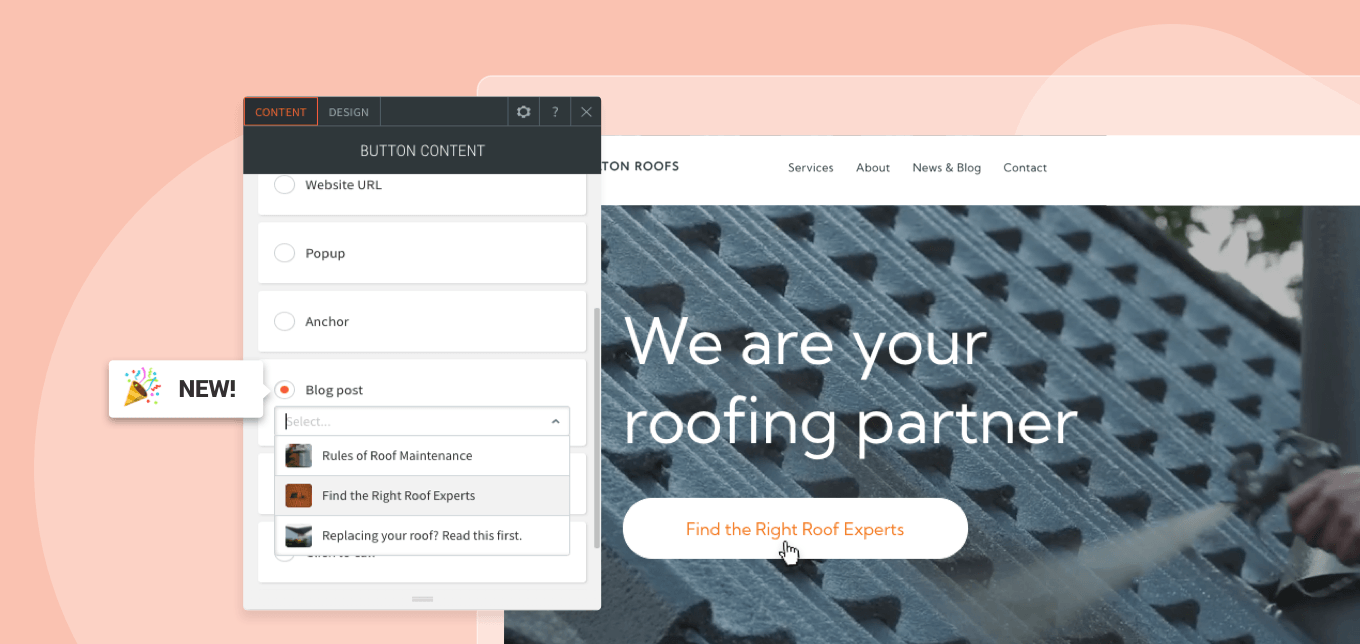
Have clients who want to add links to site blog posts from various locations on their sites? You can now do this, quickly and easily, by adding links to specific blog posts directly via the link picker.
Adding the links is easy. Simply open the Content Editor of any element that can be linked. This includes:
- Buttons
- Images
- Image sliders
- Galleries
- Icons
- Shapes
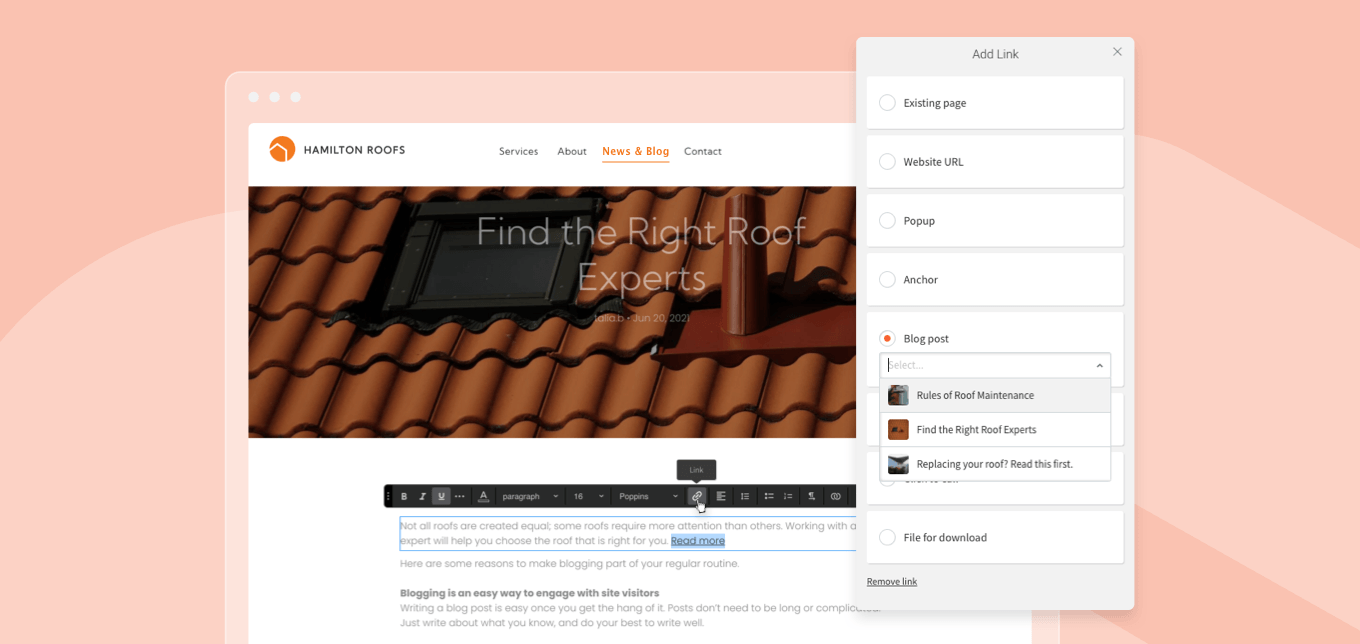
Scroll down until you see Blog post. This will only appear if you have published blogs on the site. Click on the Select field, and enter a word in the search field. Any blog post with that word in the title or author will appear and can be connected.
For example, you can link to a specific blog post from a Homepage section or use the picker to link one blog post to another, driving users to read through more articles in related topics.
7 July, 2021

When using this new capability with Dynamic Pages contact form inquiries become way more efficient. Connect the recipient email to an email field in your collection, allowing you to automatically set a different contact form recipient email for each page item (page items are the pages created automatically when connecting a page to a collection). You can also connect additional collection fields to the contact form to give more context when receiving the form submission email.
How to Use This in Dynamic Pages
- Add a Contact Form widget to your Dynamic Page.
- Right click on the widget and select ‘Connect to Data’ - this will open the Connected Data popup.
From here, you can connect the email address and additional fields you’d like included in the contact form email.
14 June, 2021
Something new - now you can find flex sections in all categories, not just flex. The new sections will appear in Intro, Features and Footer categories as well as in Flex.
4 May, 2021
- Arabic Latvian
- Catalan Lithuanian
- Danish Mandarin (Simplified)
- Dutch Mandarin (Traditional)
- English Norwegian
- English (UK) Polish
- Finnish Portuguese
- French Romanian
- German Russian
- Greek Spanish (LATAM)
- Hebrew Spanish (Spain)
- Icelandic Swedish
- Indonesian Turkish
- Italian Vietnamese
- Korean
20 January, 2021
- Duration: How long an animation lasts
- Viewport top / bottom: Where the animation begins and ends
- Intensity: The power of the animation
- Delay: When the animation starts
- These controls give you limitless opportunities for animating your sites, so you can create the effects that are just right for each site's tone and style.

20 January, 2021
- Create a Regular Page or Folder called Team in the site navigation.
- Open the Pages panel and locate the Dynamic Page you used to build the team pages.
- Click the settings icon beside that page, click Hide/Show on Navigation > Show on all.
- Select the Name field and team member names will display under Team in the site navigation.